Objective
The purpose of this article is to provide direction on how to map a Salesforce Queue in Outreach.
Every record in Outreach (prospects, accounts, opportunities, tasks, etc.) must be mapped to its corresponding record in Salesforce to accurately sync data. Mapping users including Queues ensures your reps' activities push to Salesforce and any mapped fields on the record level update properly.
Applies To
- Outreach Admins
- CRM
Notes
- The Error Message that is generated in the sync error logs in relation to unmapped Lead Queues is: The requested resource does not exist
- Use the 00G Queue ID to identify your Queues in SFDC
- Queues do not need to be an Active user and use any of your licenses in Outreach
- Queues display the 15-digit 00G in the URL which technically is supported with the Outreach configuration the same way the 18-digit ID works
Video Walkthroughs:
- Process via CRM Exported Sync Error logs - Walkthrough Video ~ 2 mins
- Proactive process via Salesforce Queue list: Walkthrough Video ~2 mins
- Process via troubleshooting a record in Outreach: Walkthrough Video ~2 mins
Procedure
Determine the Queues that need to be mapped with Outreach:
- The best option is to review all of your Queues in SFDC and complete the process outlined for each potential Lead Queue that could be assigned to records that are syncing with Outreach
- Export the CRM Error Logs
- Administration>Integrations>CRM
- Click the 3 dots on the top right and click Export Log
Resource: Auditing CRM Sync Errors
- Use a Pivot Table to find the unique count of errors: The requested resource does not exist
- Review the unique External ID's in the logs that start with 00G
- You will see other external ID's & Object types that are not Queues in the logs because those are the related records that are trying to sync that have a Queue associated with them in SFDC
- Go to SFDC
- Click the Gear icon on the top right and go to Setup
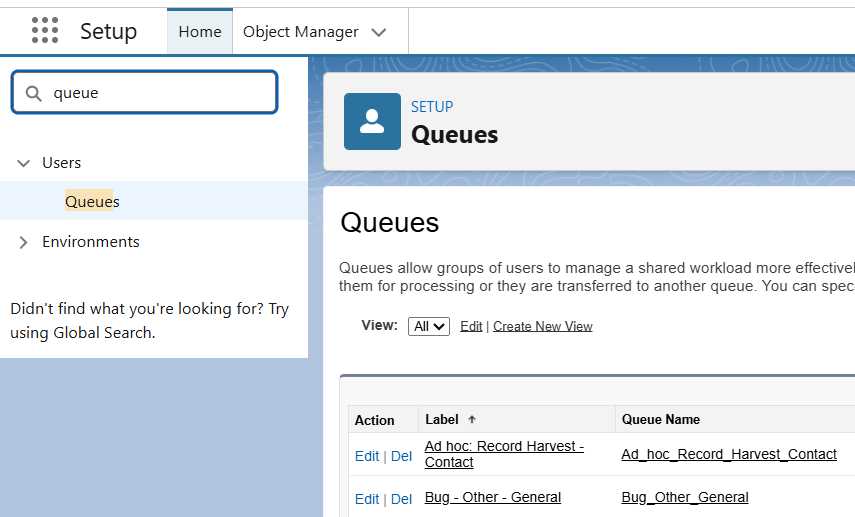
- Search Queues in the Quick Find search bar
- Click on Queues
- Select one Queue in the list under the Label column
- Replace the 00G Id from the logs in the URL starting after 3D and hit enter to take you to the specific Queue

- Use the Lead Queue name to configure the user as outlined above
Create a User in Outreach
- Administration>User management>Users
- Click Add user on the top right
- Please include: First Name, Last Name, and Email Address. Note: the email address does not need to be a functional address since Queues generally do not have email addresses associated with them in SFDC. It can be formatted as leadqueuename@domain.com.
- First Name Example: Lead
- Last Name Example: Queue
- Email Example: leadqueuename@domain.com
- The Profile setting can be left as the Default
- Add User
- Go back to User List
- Search the Lead Queue
- Select the box on the left and Lock the user
The steps on how to create a user seat are in this article Outreach Seat Management Process.
Map the Queue
- Administration>Integrations>CRM>User Object
- Click the Record Mappings tab
- Click Add mapping
Note: You can use the ID to search and confirm the Queue is not already mapped in the user list to avoid errors - On the Add Mapping window, enter the Queue ID in the Salesforce User field, then click on Add 00G4xxxx. Note: Queues won't show in the user list in the drop down menu, but by clicking Add, it will apply the mapping to the Queue
- Select the corresponding Queue user seat you have created in Outreach to map to the queue
- Click Save
- The new Queue will appear in the mapped user list
Was this article helpful?
That’s Great!
Thank you for your feedback
Sorry! We couldn't be helpful
Thank you for your feedback
Feedback sent
We appreciate your effort and will try to fix the article