Objective
The purpose of this article is to provide instructions on how to connect the Outreach MCP Server to Claude Desktop and Web apps.
Applies To
- Outreach customers who want to access the Outreach MCP Connector inside ChatGPT workflows
- Customers using OpenAI-based workflows in their line-of-business apps who want to integrate the Outreach MCP Server
Before You Begin
This article assumes basic familiarity with Claude. Before getting started:
- Read the Outreach MCP Server overview to understand what functionality is available
- Confirm that the Outreach MCP Server has been enabled on your instance
- Confirm that Claude is fully set up, including any licensing and environment requirements to enable MCP
Connecting Claude to Outreach MCP Server
Outreach Official Connector (Recommended)
Outreach has published the official Outreach connector and recommends that you use the connector to connect to Outreach MCP. This ensure that you always have the most up to date MCP tools from Outreach.
Install
Go to your Claude Desktop or Web app > Customize > Connectors > Add > Browse Connectors and search for Outreach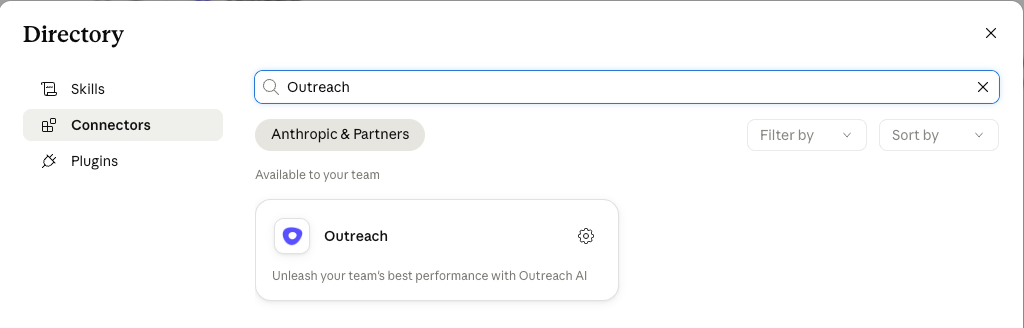
| Note: Before you Connect to Claude, make sure you're signed in with the appropriate Outreach account, the one you want to connect to, on your default browser. Most clients launch your default browser to authenticate and pick up whichever account you are signed in with. If you don't see your correct account getting connected, sign out and sign back in your browser and try again. |
In the Connectors dialog, search for Outreach, then click Connect. 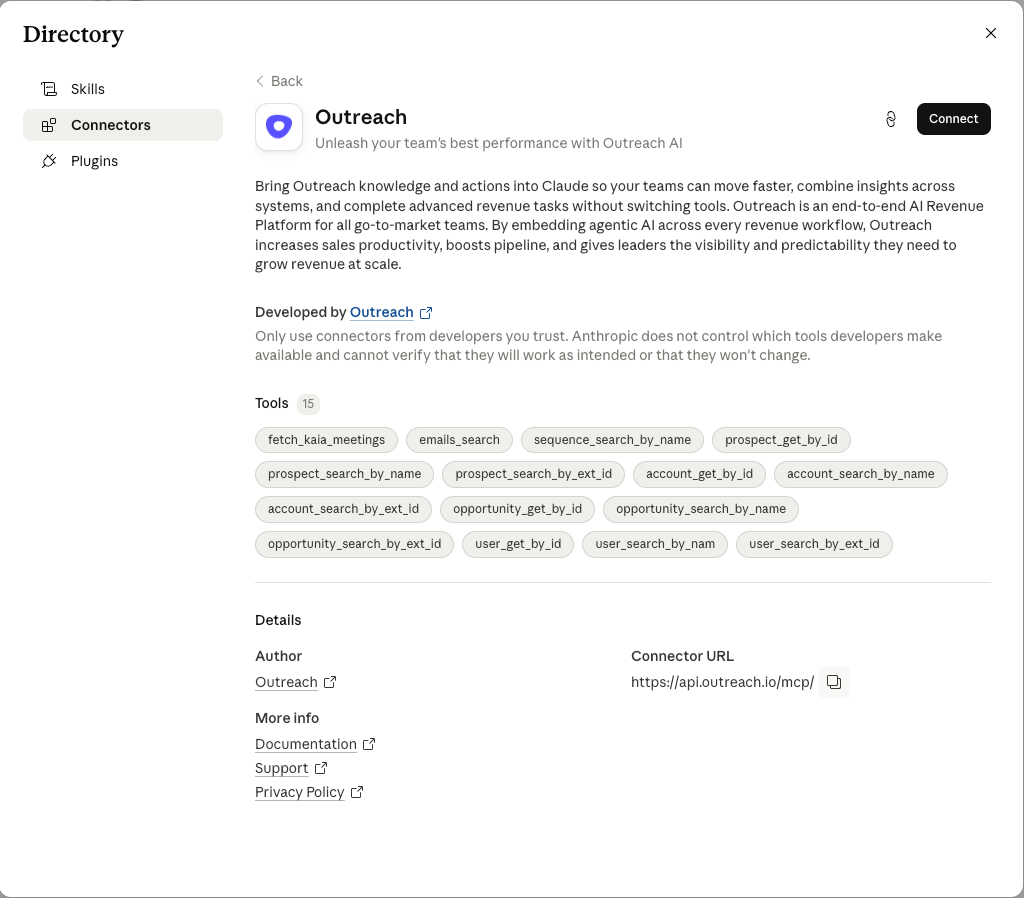
Claude should pick up Outreach MCP Server automatically. Complete authentication with Outreach if you are not signed in.
Add a Custom Connector
This is not the recommended approach for daily users. This option is available to Admins or Developers who want to connect to multiple production or non-production instances of Outreach (like Sandbox, or Testing instances). Since one Connector defaults to a single authentication endpoint, to connect to multiple end points, you'll need to add Custom Connectors for each additional end point.
| Note: If you are connected to multiple Outreach end points, make sure you are instructing Claude exactly with Connector to use to retrieve the exact data you are looking for. |
Go to Claude Desktop or Web App > Click Customize > Connectors > Hit the Add button > ... Add custom connector. 
Enter the following information:
- Name – Outreach <Instance> (or your preferred name)
- Server URL – https://api.outreach.io/mcp
- You can ignore the Advanced settings.
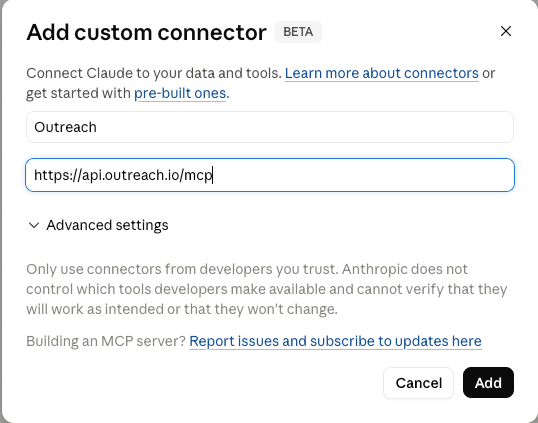
- Click Add.
- Next to Outreach, click Connect.
- Sign in with your Outreach credentials in the browser window. If you have multiple instances, make sure you're using the credentials for the organization whose MCP Server you want to connect to.
- Complete authentication by providing multi-factor authentication if required by your organization.
Authorization and Consent
If required, Outreach will prompt you to consent to the information that will be shared with Claude (or another MCP client if you're not using Claude). Once you have authenticated and provided consent, Claude will be connected to Outreach MCP Server and ready for you to run queries.
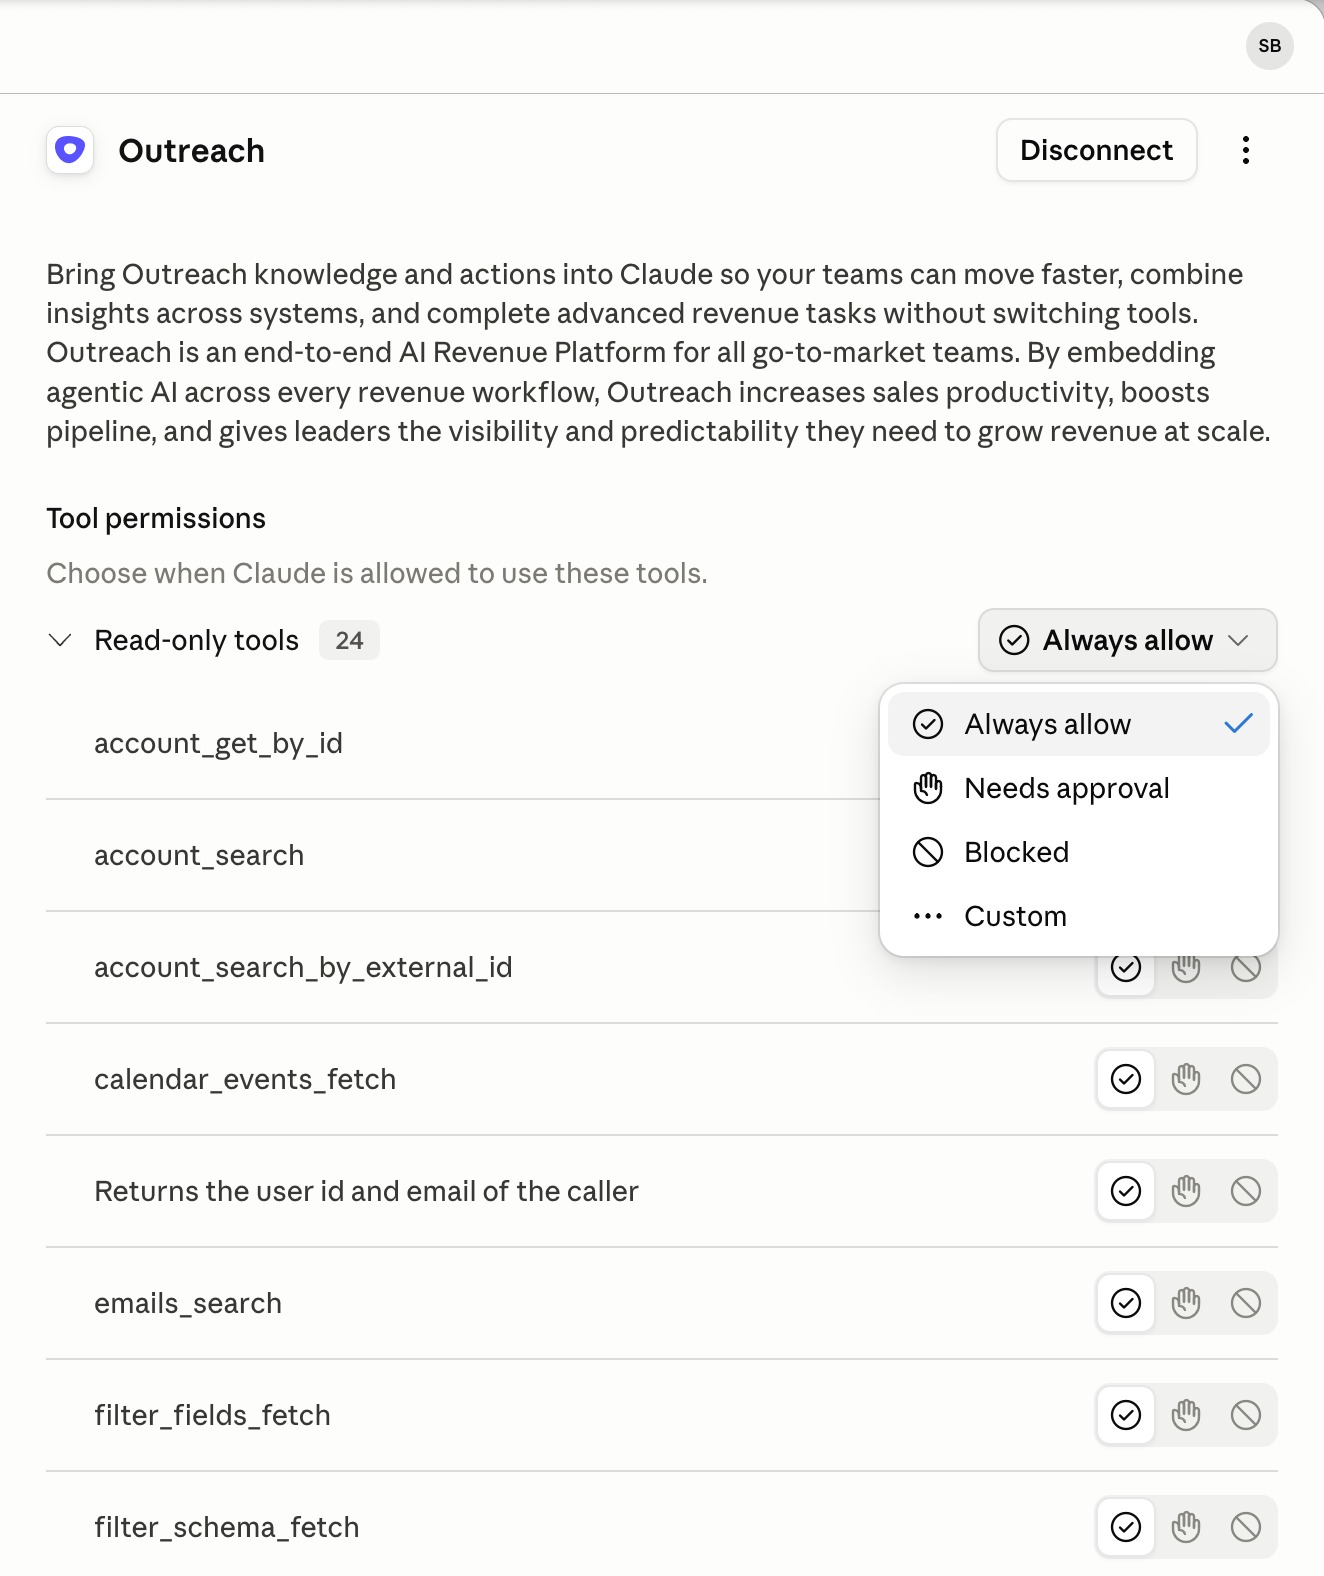
If you want to view the tools list or configure individual tools, you can do so from Customize > Connectors > Outreach > Configure.
Note: Outreach recommends that you keep all tools enabled and provide "Always allow" permission for the most productive experience.
Tool Permissions
The first time any MCP tool is used by your LLM or Agent, they are likely going to request permissions or authorization. This is not something Outreach controls and is dependent on your set up and organizational policies. Outreach recommends you keep the default behavior as it is the best practice.
If you want, most LLMs also allow you to pre-approve the tools. In Claude, as an example, you can go to Customize > Connectors > Outreach > Tool permissions and provide 'Allow all' permissions. You'll need to do this for each category of tools like read-only and write-delete. Other LLMs might have a different pre-approval workflow.
Was this article helpful?
That’s Great!
Thank you for your feedback
Sorry! We couldn't be helpful
Thank you for your feedback
Feedback sent
We appreciate your effort and will try to fix the article